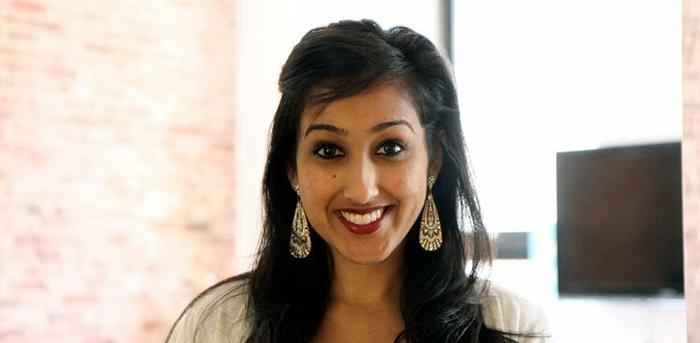
After I was laid off in January, I thought it might be a good time to update my professional headshot before embarking on my job search. As employers increasingly look at job candidates’ online profiles before making contact, headshots are more important than ever—and a photo can make or break that crucial first impression.
On a budget, I decided to give the “do-it-yourself” option a try first. But, unfortunately, with each click of the shutter, I ended up looking more and more like Gary Busey. (Not exactly the look I was going for!)
If your picture also looks more like a bad celebrity mug shot than a professional portrait—but you can’t afford to hire a photographer either—read on for a few pro tips that will make sure you get a great shot.
Create an Image
Whether you’re just establishing yourself or you’re updating your look, you want your headshot to express who you are as a professional. To borrow a phrase from Rod Stewart, “Every picture tells a story, don’t it?” So, what’s your story? Take a look at your current photo: Does it exude confidence and success? Or do the dark circles under your eyes and concert tee make it look as if you spend more time out on the town than on the job?
Before taking a single snapshot, think about how you want to be perceived. Friendly? Approachable? Competent? Practice and perfect the expression that best captures what you’re all about.
Set the Stage
Of course, another big part of getting a great shot isn’t about you—it’s about everything else around you (think lights, location, and background).
Depending on the season and how much time you have, natural light may be optimum—the colors outside look more vibrant and you may feel more relaxed, which in turn creates a more natural appearance. But professionals warn that photo shoots in the great outdoors, subject to the whims of Mother Nature, can prove tougher than you’d think. Unreliable weather, distracting backgrounds, and suncast shadows can wreak havoc on headshots.
If you’re undaunted by the elements, plan your shoot during what photographers often refer to as “the golden hour”—the first hour of light after sunrise and the last hour before sunset. While these times certainly vary by season, they typically offer soft, diffused light that’s far more flattering than what you’ll encounter at high noon. Choose a background with few distracting elements and make sure it isn’t brighter than the foreground, which also can shift the viewer’s focus away from your face.
If you’re setting the stage indoors, again, go for soft, diffused lighting. Turn off your camera’s flash, and avoid direct sunlight and any exposed light bulbs to minimize blemishes, shadows, and squinting. Photographers suggest standing near a window but not directly in front of it. Experiment with blinds to find that sweet spot, and avoid mixing both natural and artificial lighting as it can be nearly impossible to strike the right balance between the two.
To minimize distractions, consider taking the photo in front of a solid-colored wall. Don’t have one? Hang up an ironed sheet or piece of fabric to set a portrait-studio-like backdrop. But avoid black—especially if you’re wearing a dark shade—so you don’t end up looking like a floating head.
Oh, and if you want your office in the background (shooting indoors also offers a chance to include a glimpse of your work or company), make sure it’s clean and well-organized. No one wants to do business with someone whose next gig might be appearing on a Hoarders episode.
Dress for Success
Employers want to hire people who look professional. So, when deciding what to wear, opt for classic, timeless, and work-appropriate. Choose solids over prints and patterns, which can quickly look dated, and if you’d like to accessorize, keep it simple and timeless (think pearls versus statement necklaces).
When it comes to colors, photographers and fashionistas agree that blue, green, wine, and purple are your best bet because they are universally flattering. Avoid flesh tones, and unless you’re going for a bold look, stay away from red and orange. And simple necklines keep the focus where it should be: on your face.
Strike a Pose
Chances are if you don’t have the cash to hire a pro, you can’t afford a top-of-the-line camera either. Not to worry—photogs concur you can take a usable shot with a point-and-shoot or even a smartphone. It goes without saying that selfies do not make for great headshots, so if you can’t enlist a willing friend, borrow a tripod or place your device on a table or shelf where it can sit at eye-level, and set the timer.
But, because, again, you don’t want your photo to look like a mug shot or driver’s license, don’t stand dead center. “Just remember that the camera flattens out what it ‘sees,’ so standing straight on to the camera is not flattering for anyone,” advises professional photographer Marlisa Williams. Instead, position yourself on one side or the other and then turn your head toward the camera.
And remember what your mom has probably told you a million times: “No slouching!” You want to come across as confident but relaxed, so put your body language to work for you.
Be Patient
Because headshots have become about both your image and your brand, it’s worth your time and effort to craft a homemade masterpiece. But don’t expect success at the first click of the shutter. It may take hundreds of shots before you capture just the right one. Experiment with angles, lighting, and locations to find the most flattering combination that sends the message you want to impart.
And don’t forget the final step: editing. While you might not have access to the same equipment and techniques the pros use, low-priced apps like Facetune, GorillacamPro, and Snapseed can help level the playing field by providing editing tools galore.